If you change the way you look at things, the things you look at change.
Showing posts with label sewing. Show all posts

Saturday, July 5, 2025

Patriotic Decorating

I've always enjoyed celebrating and decorating for Independence Day. Not only is it a good reminder to me about how fortunate I am (at least for the time being) to be able to live in the country with the most freedom in the world. 

Years ago, one of our granddaughters was spending some time with us and we worked together to craft decorations that I look forward to displaying each and every year in my Patriotic Decorating.

When I hung his little banner of flags so carefully stitched, I was smiling the entire time. Once again I was remembering the sewist.

When she was working so diligently at stitching the flags to the ribbon, she was concentrating and quiet and working hard at stitching.  Then, her stitching got looped around the ribbon and had a bit of a tangle. All of a sudden, she exclaimed, "Grand B, we have a situation here." 

We worked together to get it all straightened out with no "situations" in our finished products. She learned how to stitch and how to take the stitching out and stitch again.

I couldn't help but smile at her little snaggle-toothed exclamation then and I think of it every single time I get that banner out to hang it up for celebrating.


My, how time does fly! When I finished hanging the banner this week, I sent the photo that starts off this post via text to that little sewist, who now looks like this...

What a situation!


Thursday, November 2, 2017

Sewing Project

About a month ago I got a bag full of fabric and this drawing from Bryan and Jessica.


I asked for some window measurements and a couple of days later I got a text with this drawing:


Part of the fabric in the bag was curtains that I had stitched together for Harris's bedroom when they lived in Clarksville.  In their new house, Harris's bedroom has two windows.  So, we decided to just split the two panels I had already made and use them again in this bedroom.

I had lined them.  So, I decided to take them completely apart down until I simply had pieces of fabric and strips of ribbon.  Then, I cut them in half, making two panels for each of his windows.  Here's how that project turned out:


They almost look custom made for this bedroom!

The rest of the fabric in the bag and the drawing was for Linley's curtains.  So, that was my next project to take on during my fall break.  I really like how they turned out as well.


They are simple, sweet, feminine and work well with her coverlet and other decorations.  Next time I'm over there, I will try to remember to make photos of all that sweet girliness.

Sunday, September 20, 2015

Easing into Fall

It is September and my summer door decorations were looking tired and sad.  The blue burlap ribbon had faded terribly.  The tan burlap flags were looking a bit tired and they had darkened some.

I'm not quite ready to break out the pumpkins from last year and Halloween decorations as yet.  So, I decided to dig through my scrap pile to see what I could put together to tide us over.

I found a remnant of dark brown burlap.  It was 1/3 of a yard.  So, I decided I would try to get four small flags or banners out of it.

I dug through the fabric stash and found some orange chevron-striped fabric left from a baby blanket project, I think.  So, I drew a couple of leaf-shaped patterns and made some appliques for my burlap.

I decided that I needed something to coordinate with it.  So, I chose a solid orange piece of fabric.  Here is what I wound up with for my door decorations.
I'm using the same burlap ribbon with black swirls that I used last winter and all through the summer.  This time I topped those bows with orange gingham wired-edge ribbon.

My remnant and scraps made four door decorations with falling leaves and fall colors.
Here are the two French doors off the back porch.  I have another one there on the back at the laundry room entrance and another one for the basement entrance.

I guess I'm just easing my way into fall this year!

Saturday, September 19, 2015

Playing with Stripes

I've been playing with stripes today.

You may remember the last time I played with stripes.  I had stumbled upon a bargain one day when Bridgette, the granddaughters, and I were out junking.  I saw some red and ivory striped fabric and crafted a pillow cover which played with the stripes.
It was perfect for my project and I learned a lot about creating with the wide striped fabric.

That same day, I found some green and ivory striped linen.  At the time I had no idea what I would do with it but I bought a couple of yards for $10.

Today I cut the fabric into triangles with the stripes going across the Isosceles triangles.
I stitched two of the trianges together, matching up the stripes.  Then, I pressed the seam to one side.
At this point, I had a larger Isosceles triangle with the stripes mitering to form a ninety-degree angle.  (Who ever said all that math would never come in handy?)

I did the same thing with another couple of the triangles.  Then, I joined the two large Isosceles triangles together to make the top of my pillow.

Next, I cut a couple of strips to form the back of my pillow.  These two strips were the same width as my pillow and about 2/3 the length.  I turned one edge under a half-inch a couple of times and stitched the fold to form a hem.  Then, I overlaped the two hemmed edges in the center and lined up the cut edges to the edge of my pillow top.  I stitched the two strips to the pillow top with right sides together.  Then, I turned it right side out and pressed the edges and I had an envelope pillow cover.

Voila!
This time, the stripes formed squares!  What fun it was to see the design take shape.  I've seen these covers offered for sale in catalogues and online like this one for $38:

Wow!  My little bargain remnants seem like a real deal when I consider that I also found this one online for $106

I also put together a couple of other pillows. this afternoon.  You can see them flanking the striped pillow here on the couch.  I will share more about them in another post.

One of the good things that came of my making this pillow with the mitered stripes forming a square is that there were also four other Isosceles triangles.
You can see the left-over triangles there on the right.  On these triangles, the stripes run up and down.
So, when I stitched them together, they formed a cross very much like the red pillow I made earilier this summer.
I topstitched the cross seams on this one to give it a bit of stability.  The center of it stretched a wee bit because it is on the bias, I guess.  Now, I've got to either buy me another Euro pillow form or make one for this pillow.

I'm pleased with my bargain striped fabric that I got when we were out junking!  Two pillows out of my $10 fabric - and a bonus!  I have a bit of it left over.

Maybe I should give some other designs a try.  Like this one:
I also like this one that is black stripe and navy stripe:
This one is a bit different, too:
It has been fun playing with these stripes.  It kind of makes me wish I had bought more of that green striped bargain fabric.

Wednesday, July 15, 2015

That Was Then/This Is Now

I remember when I was young and folks would talk about having to make adjustments because they were getting older.

I remember my reaction to such tales.

I would roll my eyes.

I might not roll my eyes where everybody could see me doing so but believe me, I rolled my eyes.

Now, things are a little different.

Now, I am the one making adjustments because I'm getting older.

One way I seem to be adjusting is by making everything lighter in my house.

The darkest room in the house is the den. (Well, unless you are in the basement with the lights off,)

One reason is because it faces the front porch and there are two huge oak trees providing shade on that side of the house.

Another reason is because I hung some beautiful Merlot-colored, silk, drapes with soutache braid and coordinating sheers as window treatment.  

Those drapes made the room cozy feeling.

They added a rich pop of color to the otherwise neutral room.

They also made the room sort of dark.

So, I decided to do a bit of lightening up.

I also decided I wanted to do it on a budget.

I think I succeeded.

Two canvas drop cloths for $10 each...

A couple of lines of stitching to create a rod pocket...

A couple of hours of ironing...

Voila!

A lightened up den!


I kept the same tie-backs and the same style.  Only the lighter, more casual fabric made lots of difference in the room.

I'm telling myself this adjustment had nothing to do with me getting older and wanting the room to be lighter for my old eyes.

I'm telling myself I was just freshening things up a bit!

Tuesday, July 14, 2015

Experienced

As they were riding down the road, Lydia informed her mother that they could make her new Barbie some clothes.  After all, she is an experienced sewist!  So, the other day Bridgette got Lydia started at stitching up a dress for her doll.  A little later I got a text message telling me that Barbie does have a new dress.  Lydia sewed one side seam and Bridgette finished it and she added, "And let me say, it's a bit tedious to sew Barbie clothes."

My response:
Now you know why I never made your Barbies clothes or any doll for that matter!  You should stop right now and thank your Mamaw for the doll clothes she made for you and with you!

Fancy Barbie Dress and Happy Girl!

Thursday, July 9, 2015

Making a Slipcover

I dipped my toe in the water of making a slipcover today!  I think it made for quite a metamorphosis.

It all started with a yard sale purchase.  My eldest nephew's wife recently had a yard sale where they were cleaning out before a move.  The house they are moving into had some items left behind and this footstool was one of those items.  She put a sticker with $3 on it and I snapped it up.

I knew right away that I wanted to cover it up.  After all, it really wasn't very pretty at all.  Plus, it had some cosmetic damage - a rip and a paint droplet.

So, it sat in my craft room for a couple of weeks.  Since the temperature was so high, I decided to take on an indoor task today and this stool seemed to be calling my name.

I stared at it a bit and decided that I don't really like the color of it.  I don't really like the shape of the legs.  Really, the only thing I do like about it is the size of it.

So, I dug into my fabric stash and found a two-yard remnant that I had bought at least a dozen years ago for $4.99 per yard.  It is a companion fabric to that on a couple of wing-back chairs I have that were rescued from the dumpster by my friend, Phyllis.  My parents had them covered for me as my birthday and Christmas gift when I moved into my last house.

I measured the top from seam to seam - 25.5" x 21.5".  I added an inch to each dimension for a seam allowance, marked my fabric, and cut a rectangle 26.5" x 22.5".

Actually, I cut a rectangle and decided I wanted the fabric to run from the higher elevation to the lower elevation.  So, I measured, marked, and cut another rectangle running differently with the grain of the fabric.

The first rectangle didn't go to waste, however.  Next, I laid the stool up on its side atop the first rectangle I cut and marked the top's highest point and the top's lowest point.  Then, I drew a line connecting those two points and adding a half-inch for a seam allowance.  I cut the two sides from my original rectangle.

Next, I measured the fabric, marked and cut the rectangles for the front and back panels.  These had to be cut separately because the back side of the stool is taller than the front side.

Laying right sides of the fabric together, I stitched the front, back, and side panels to the top.  Then, with right sides of the fabric together, I stitched up the sides.

I toyed with the idea of using some sort of cording at the seams but decided that I didn't have enough fabric to create piping.  I dug through my trims and found a cording but again decided that I didn't want to use it because I wanted something far simpler.  So, I simply top-stitched the seams.

I paused and tried the slipcover on at each step to make sure it was going to fit properly.

When I got to this point, I measured the drop or length of the leg so that I could make a skirt to reach the floor and cover the legs that I'm not in love with.

I decided that I wanted to have a center box pleat in the front and back of the skirt.  After doing a bit of thinking, I decided to make the skirt in panels.  The front and back skirt have a three-inch box pleat and the side panels have a one-inch knife pleat.  I also knew that I would need some short panels to wrap the corners.

So, I measured, marked, and cut three strips to make the skirt.  I added two inches for the hem and an inch-and-a-half to finish the sides of each panel.

First, I turned the fabric hem-edge up a half-inch and pressed it.  Next, I folded it over one-and-a-half-inches and pressed it.

I stitched the hem as near to the edge as possible.

Then, I turned each end under a half-inch and pressed it.

Next, I turned that fold over an inch and pressed it.

Again, I stitched this as close to the edge as possible.

I folded the front and back panels in half to find the center-point and measured up one-and-a-half-inches on either side of this center-point.  I pulled those points to the center point and pressed.  Again, I lay my skirt along the edge of the in-progress slipcover to check for correct length.  After creating the front and back skirt panels, there was a piece left that was nineteen-inches in length.  So, I cut that in half and finished the ends just like I did the skirt panels.  This gave me my four skirt panels to wrap the corners.

For the side skirt panels, I finished the edges, folded them in half to find the center and created a simple knife pleat.

There was so much thinking and planning involved in creating the skirt panels that I completely forgot to take photos.  Sorry!

Then, it was time for assembly.  I placed the front skirt panel, right sides together onto the slipcover-in-progress.  I made sure to match up the center of the pleat with the center of the slipcover and the edges of the skirt panel with the side seams of the slipcover and stitched the front skirt panel to the slipcover.  I stitched went to the stool to make sure I had made my skirt the correct length.  Then, I stitched the the back skirt panel to the slipcover the same way and again checked for correct sizing.

I placed the skirt side panels right sides together with the side of the slipcover, making sure to line up the center of the knife pleat with the center of the slipcover side piece.  I stitched the skirt side panels onto the slipcover.

Next, I centered up the small corner wrap pieces with the side seams of the slipcover and stitched them on top of the skirt panels.  Then, I pressed the seam up toward the slipcover and topstitched it down.

I gave the whole thing a quick press and slipped it over the stool.

It is far from perfection, but I am quite pleased with it and am thrilled at how easy it was to create.  Time-consuming, but quite easy.

I had a wee bit of fabric left over - maybe enough for a pillow, maybe.

Before and After:

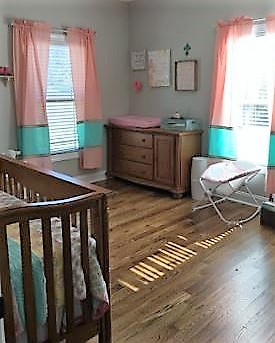
Here it is with the chair.

I think it was a good day's work and was a bargain - $13 for a new stool!  I also think I might try another slipcover sometime!