If you change the way you look at things, the things you look at change.
Showing posts with label projects. Show all posts

Friday, June 20, 2025

A Quick and Easy Project

 One of the things I've noticed in my retirement is that I tend to procrastinate. So, with that being noticed, I also have noticed that I am not getting things done as quickly as I thought I might. I guess I thought that by now all of the closets, cabinets, and enclosures in our house would be cleared out and tidy. I guess I thought that by now our acreage would look like a well-tended garden. I don't really know what I thought would change about me to get those things into such a shape, but it hasn't and it doesn't all look and feel like that. 

Oh, I have done some clearing and straightening and cleaning out and tidying. However, we are still far, far from having a place for every little thing and everything in it's place!

One project that I did tackle is one of our mailboxes. Yes, I said one of them because we have three. One is on a post at the back porch and holds gardening tools.


One is at the end of the driveway and the postman leaves our mail there.


The one I took on as a project is on the end of the house near the basement entrance. We added it years ago when my mother-in-law first moved in with us. I thought it would be a great place for us to leave her mail after gathering it from the one at the end of the driveway and we would not have to disturb her. I did that for years when I brought the mail to the house. 

Then, it became Mike's 'job' to get the mail and he used that as an excuse to go inside and check on his mother each day. So, it became just a decorative element beside the door. Since Mrs. O has passed, it became an easy spot to leave something small for others to pick up or a place to stash the cash bag for a Facebook Marketplace sale. 

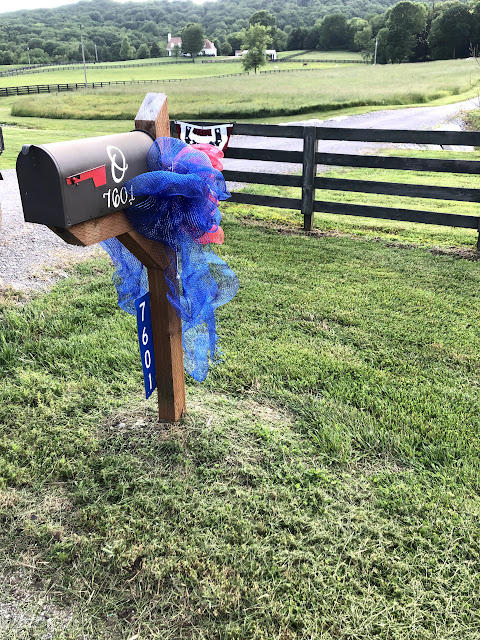
Over time, it had gotten sad, rusted, and unsightly. It is still functional and handy for leaving something to be picked up when we are not going to be handy. So, I didn't want to just remove it. I decided a paint job would do the trick.

There was also a stinging set of residents who were keeping house inside there. So, I took some soapy water and a brush and cleaned it up a bit. Then, the next day, I wedged large pieces of cardboard around it. I dug out a can of anti-rust spray paint that was left over from another project and gave it a coat of paint.


You can see that it has an insignia on it to indicate royalty. I think the advertisement for it said that it was modeled to be like Queen Elizabeth's way back when I bought it. So, I thought it was a tongue in cheek way of honoring my mother-in-law. I think I am the only one who ever even know that, though.


The new coat of paint gave it new life and I am quite pleased with it. It is a nice decorative piece and even if we never use it as it was intended, it sort of brings a little smile to my face. 

Plus, one project has been checked of my list!

Thursday, April 10, 2025

Projects - Kitchen Window Treatment


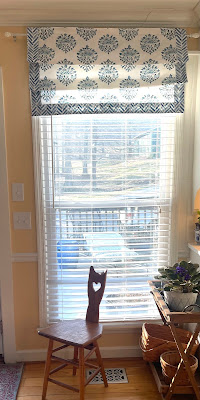
I did a little refresh on the kitchen recently. After seeing lots of block print fabrics featured in home decor, I decided to update the kitchen window treatment with a block print fabric. I shopped online and found a print I liked that I thought would cheer up the windows in the kitchen. Then, I ordered just enough to create a faux Roman shade for the two windows. I also ordered a nice print to use for trimming out the edges.

My fabric came from Spoonflower and I paid full price. I was not compensated by the company in any way. The fabric I chose is called Handblock Medallion 6 Blue on Whitney White Fabric. The contrast that I used for trim is called Indigo Blue Painted Chevron Herringbone. I ordered a length of both fabrics that was two yards in length. The fabric was 58 inches wide. I neglected to make photos along the way. So, I've created some diagrams to illustrate as best I can.


To begin, I measured the width of the window and added an inch. Then, I trimmed the selvage edge off of one side and cut the medallion fabric that width, plus one inch to allow for seam allowances. Next, I cut the fabric in half so that I had the same length for both windows. Then, I gave both pieces a quick pressing to get the wrinkles out. 


I trimmed the selvage edge off one side of the herringbone fabric, measured and cut 2 pieces that were a seven inch width and the full length of the fabric. These two pieces would form the trim for the sides of the shades.


Then, I measured up seven inches and cut a strip of fabric that was the full width of the fabric. And repeated that process so that I had two seven-inch strips that were a wee bit wider than the width of the medallion pieces. These two width pieces would form the trim for the bottoms of the shades.


I folded the two lengths that would form the side trim in half with wrong sides together and pressed. This resulted in two strips that had a folded edge on one long side and two raw edges around the other three sides. Then, I folded the two widths in half with wrong sides together and pressed. This resulted in two widths hat had a folded edge along one side and two raw edges around the other three sides.

Now it was time to assemble the shades. I placed one of the folded strips on the left back side of the medallion piece and the other folded strip on the right with the folds toward the center of the medallion piece. The cut edges of the medallion piece and the folded pieces were flush with one another.


Then, I stitched down both sides using a half-inch seam. Next, I pressed the seam allowance toward the front of the medallion fabric. Then, pressed the herringbone fabric over to the front of the medallion fabric.


Then, I stitched along the fold of the herringbone fabric. The stitching is 1/8th of an inch from the folded edge. That encased the raw edge of the seam inside the trim.

The next step was to trim out the bottom of the shades. So, I lined up the raw edges of the widths of the herringbone fabric to the raw edge of the bottom of the in-progress shade, leaving about an inch overhang on each side. The herringbone strip is on the back side of the shade-in-progress.

I stitched the bottom trim to the back of the shade-in-progress using a half-inch seam. Then, folded and pressed the seam allowance toward the medallion fabric and folded and pressed the trim piece toward the center of the shade.

Next, I stitched along the folded edge of the bottom trim 1/8" from the fold. Then, I folded the raw side edges under twice to encase the raw edges inside and stitched those edges down as well.

At the top, I created a rod pocket by cutting a four inch strip of the herringbone fabric. I laid this strip atop the shade with right sides together and I stitched a half inch seam, making sure to have at least a one-inch overhang on each side.


Then, I folded the side edges over a half-inch and then a half-inch again and stitched that edge down to enclose the raw edges.


Next, I folded the raw edge of the rod pocket under a half-inch and pressed it. Then, I folded the rod pocket strip over to the back and pressed the seem connecting the rod pocket and the shade down to have a crisp edge with none of the herringbone fabric showing on the front. 

I stitched the folded raw edge down to create the tube on the back to hold the curtain rod, stitching 1/8" from the folded edge. Then, I stitched a line across the shade from side to side one inch above that. This gave me a nice little header above the space where the curtain rod would slide through.


This method left me with no raw edges and a smooth completed finish. After that, I determined how deep I wanted the folds of the shade to be. I sewed a small plastic ring at the fold near the edge of the shade for each 'pleat' that I wanted folded up. Then, I sewed another plastic ring on the opposite side near that edge and another ring in the center. Finally, I cut a short piece of cording and tied the rings together to form the folds. I ran the curtain rod through the rod pocket and hung the shades.


I decided I liked the look so much that I also wanted a faux shade above my sink. However, I didn't have a wide enough piece of the medallion print to fit the window. So, I took the piece that I had and matched the pattern to form a strip wide enough to go across the window. I finished the sides and the bottom the same way I had for the large window shades and hung it on a tension rod pushed between the cabinets.


The window treatments seemed to finish off and add a cheerful note to our updated kitchen. Even the mister commented that he really liked the new look!






Wednesday, April 9, 2025

Projects - Lamp Project

Don't we all have projects that we postpone until we have plenty of uninterrupted time to complete them? 

I have such a plethora of projects that have been postponed. I am starting to tackle some of them one by one. It is such a fabulous feeling to have space to work, to have time to focus and dedicate to completing projects, and to have the luxury of walking away from them or pausing and coming back to them.

One of the first projects I've tackled is to transform a lamp. 

Several months ago, I picked up a lamp from a local fellow who sells items that he picks up in storage facility sales, home cleanouts, at the end of estate sales. He advertises to sell STUFF. I follow him with a social media account and have picked up some treasures. The lamp and shade for $10 was one such treasure. 


My plan was to use it in the basement bedroom on the bedside table between the twin beds. Shortly after purchasing, I saw a blog post that inspired me to take on a little DIY project. Rachel at The Ponds Farmhouse had transformed a similar lamp to create a dupe of a Ballard Design lamp. I decided to follow her example and update my rather simple lamp. 

I began with a spray on primer coat for the lamp. Then, followed Rachel's instructions exactly.


I searched online and found a lampshade for about $14 at Hobby Lobby and my project is complete!


It has wound up in the basement den because I thought the space needed something of substance. That means, I'm on the search for another lamp for the bedroom. Here is a look with it lit up in the space.


I'm pleased with the project and hope that it is just the start of loads of fun and successful ventures.

Sunday, October 11, 2020

Fall Project Number 1 - The Solution (Continued)

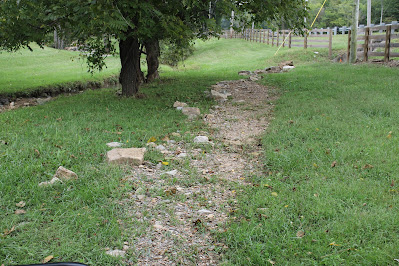
Yesterday I shared the saga of a flooded driveway.  Something that we have been being kicked with for the past couple of years.  We may never get another flooding rain.  But, this last one truly devastated our driveway and our pocketbook.  The first picture below shows rock and gravel that washed away from a culvert that goes under the highway in front of our house. 
The picture below shows how the flood waters wreaked havoc on our son's culvert.  It washed huge rocks out away from their culvert and washed away the sides of the creek bank.
Those huge rocks below were lining the edge of the bank and up against the concrete culvert that you can barely see at the left edge of the photo and are now laying in the bed of the creek.
Leaves, limbs, roots, and debris got hung up at a tree and the pile up against the tree trunk is as tall as me - well over five and a half feet.
We knew that adding more rock to cover our culvert was only more like putting a band aide on a cut artery.  So, we got a local concrete crew to come in and make a permanent crossing for our driveway.

I was amazed that they came in with such minimal equipment and wondered a bit about how permanent their work might turn out to be. 

I watched out the window while I was working that day and could see the progress being made right before my eyes.

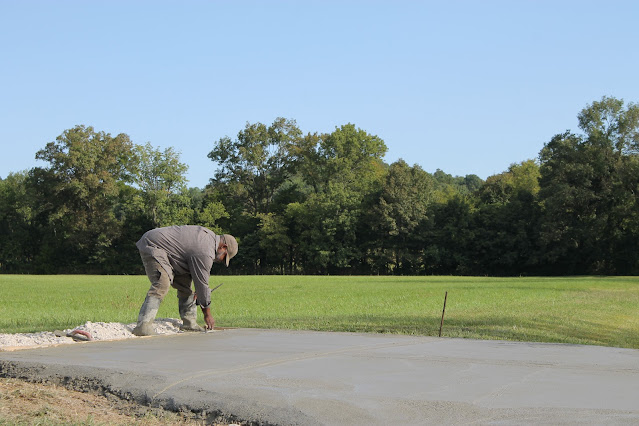
The gravel that we had just added was scraped back away to either side of the creek.  They used the only piece of equipment that they brought to dig out the gravel and move it aside. They dug down below the concrete sides that were poured last year. The crew are guys who grew up in this community and Mike has known them all of his life.  They are like extended family to him.  One of the guys is a familiar face to me because our sons played baseball together when they were boys.
They worked for almost an entire day moving gravel and digging out and setting up boards as forms for the concrete.  Then, a couple of days later, they were back and were followed by a concrete mixer truck.

Load after load of concrete was emptied.  I think I counted three truckloads delivered.  The truck would pull in.  Concrete would be pushed from the truck down that long trough onto the driveway. Then, those guys would go to work pushing and smoothing and raking and leveling. Back-breaking work and time sensitive. They needed to get it spread and leveled and smoothed before it started to 'set up' and become hard.


First they worked with tools that had long handles and used a board to smooth and shift the mud-thick concrete. They used manpower to move the concrete around to make it set right where they wanted it.  


Then, they used tolls with an extended handle and a lighter touch to float the air pockets out and smooth out the surface.  


Next they spent some time smoothing it out and making certain it was level.


The finesse they used truly made it look easy but I cannot imagine how much their legs and backs must hurt at the end of the day!
The last touch of the day was with a broom like tool with an extended handle that was used to add texture to the surface. Hard work, concentration, and a fine touch but never did you see them when there wasn't a smile on their faces.
And it turned out just as smooth and level and perfect as can be!  It was amazing to watch them and to see the results of their work.
At the end of the day, there were ramps running down alongside the concrete that was already there that would direct the water off the surface and down into the creek.  There is a gentle slop from the center out toward the edges to encourage the water to run off instead of stand on the surface. There are grid patterns to allow for freezing and thawing of the ground during winter.


We really wish we could add this surface all the way from the highway to the house.  However, at this point, our driveway has cost almost the same as the first house I ever bought!  Yet, we feel like we have a permanent solution in case of flooding.  I cannot say that we weren't tempted to drive out the driveway last night in the middle of the night when the rain was falling rather hard. Even though we knew it wasn't raining hard enough to flood, we still had that anxiety in our gut!  Mike is so confident, however, that this is the last time we will have to have work on this part of our driveway that the other day I overheard him tell a friend, "If this washes away, I'm leaving this place!"