If you change the way you look at things, the things you look at change.
Showing posts with label update. Show all posts

Sunday, January 28, 2024

Livening Up a Grey Room with a Roman Shade

Grey is a bleh color to me when it comes to decorating. I have hated the trend that everybody has been fond of - painting everything a neutral grey. To me it seems cold, dreary, depressing, and institutional or prison-like. So, I was not thrilled years ago when my mother-in-law had the walls and cabinetry in the basement painted grey. Knowing that it was to be her space, I did not want to object and really wanted her space to be her own. Now that we are reclaiming that space and repurposing it to meet our needs, I am learning to live with the grey as best I can. The paint is still in really good shape and I just cannot justify having it covered over just because it is not my favorite. So, I am looking for ways to live with it but liven it up.

One of the grey walls in the basement.

We recently began to turn one of the front basement rooms into an office. I need a dedicated work space, since I still work from home many days. I will also want an office-type space even after I retire. I will want a space for bill paying and working on our farm paperwork. I will want a space for writing as I want to write a book similar to the one I helped my mother to put together as a way to share her lifetime memories with our children. I will want to have a space for sewing and crafting when I take on creative projects.

So, I began to look for ways to liven up the grey room and make it more friendly. I decided that an easy way to get started with that would be to add a decorative window treatment. I knew that I didn't want to cover the window because I want all the natural light I can get coming in through the window. There are blinds for controlling the sunlight where it won't be glaring in and blinding while I work at the desk. 

My first thought was that I wanted to add pretty floral panels to the sides of the window and make the room rather feminine. Then, I realized that might not be a possibility because the window is not really centered on the wall allowing for a full drapery panel on either side of the window without covering any of the window. On the right side, there is about three inches and on the left, there is considerably more space.
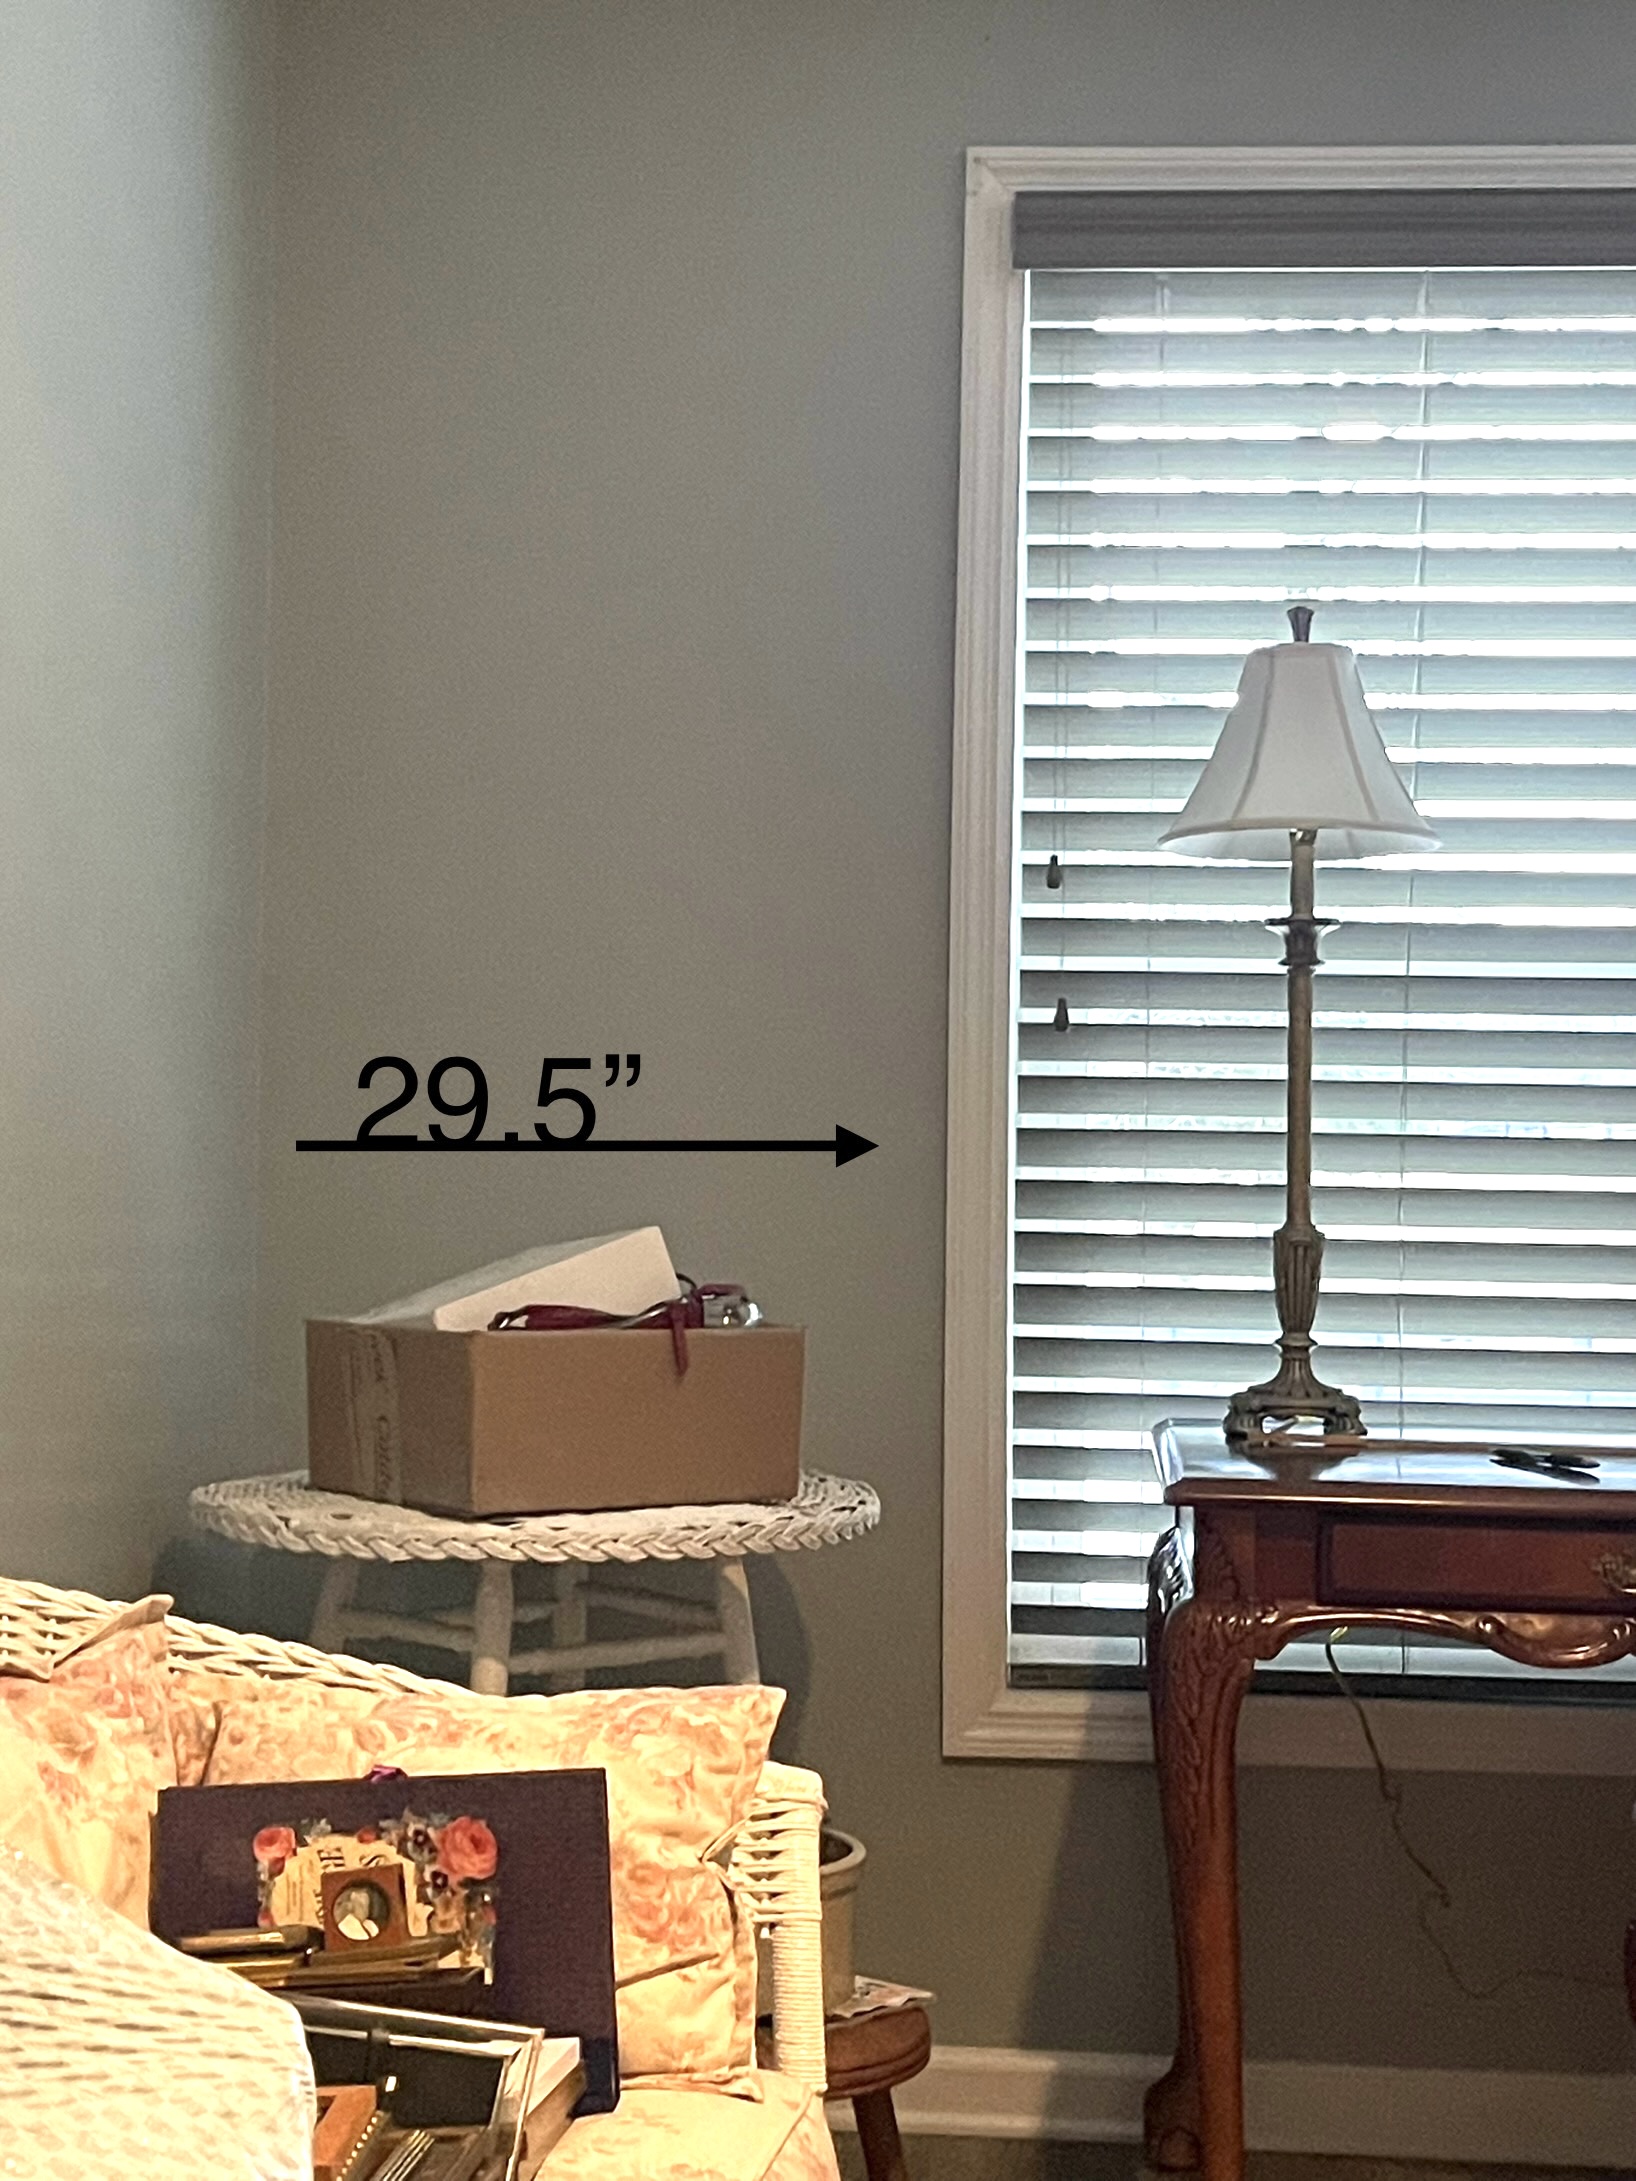
So, I started turning through the pages of my 'house look books' and surfing the net and saving ideas. I began to notice a trend in what I was collecting. They seemed to all have some sort of floral Roman shade that draws the eye up but brightens and livens up the space. The inspiration I seemed to keep coming back to was this office with a Jacobean print shade and incorporated the greens and blues that I have going on in the room already. 

So, my next turn was to dig through my fabric stash and see what I already had that might work to combine the color scheme I had started. Remember that I am trying to do this office on a budget and I want to use as many things that we already have as possible. I have a pair of pillow covers made of a Jacobean print that I first bought to try to work into a bedroom with my grandmother's cross-stitched quilt. The fabric turned out to be a bit too creamy or lean too far toward yellow. So, I made a couple of pillow covers that I use in the den and hung the rest of the fabric on a hanger to keep in my stash.

When, I pulled it out, I realized that it might just be the perfect fabric. It has the hunter green color that is found in the green check chair and it has a nice sky blue color that would brighten things up as well. So, I quickly decided that I ad found my fabric to use in the office. When I started measuring and planning, I realized that I was going to have to seam a couple of pieces together to reach all the way across the double windows. So, I gave my friend, Kathy, a call. She made thousands of window treatments over the years and I knew she would be a good resource. Of course, I watched dozens of online videos as well! The two that wound up being my strongest resources were How to Make a False Roman Shade and How to Make a Roman Shade. 

Kathy suggested that I might not want to have the seam running down the middle of the window because that might draw too much attention to it. After I sent her a hand full of photos, she told me that I might not need to worry about the seam showing because there was so much going on in the fabric and I might be able to match the print quite well. So, I went to work.

I measured my windows and measured my fabric and used the instructions provided by the YouTube videos. Then, I stretched the fabric out across the floor and ripped one end to get a straight edge. I know that isn't recommended for all drapery fabrics due to the width and the nature of the fabric's weave. It is just something I feel better about when I am sewing. A straight edge makes my life easier. Then, I began to stretch out the next run of fabric to match the print for the seam.

Matching it up was pretty easy. In my mind, I was thinking I would just sew the two pieces together to make a tube. Then, I would split one of the runs of fabric so that I had a seam on both sides and the center panel would be one run of the fabric. As it turned out, that match up wouldn't work out for me so well. So, I decided I would stitch the two together and see out the seam turned out. 


Kathy suggested that I press under one of the fabric's selvage edges to make the matching a bit easier. Plus, I could just stitch along the fold of the pressed edge and my seam would probably be easier and nicer to match up. It worked beautifully!

The fabric panel on the right has the selvage pressed under 
and the two pieces are pinned together to match the print.

With excitement, I stitched the two pieces together and gave the entire thing a nice pressing. 

Then, I turned to the other selvages and sides and realized that it wasn't going to work out as a had envisioned. The edges and the print was not matching up as I'd thought it would. So, the beauty of having this space is - I could walk away from it and leave it out for a while to decide what to do next. I ordered some trim tape to cover the seams and thought that might be the way I would go. 

At this point, I was going to have to make the shade shorter or have less folds 
or cover the seam somehow because the sides were not matching up as I'd hoped.

The more I thought about it, the more I began to think that the print of the fabric was not going to show the seaming as obviously as I had worried it might and I wouldn't need to do anything for it to be camouflaged it at all. So, I just decided to cut one side off and press the seam out and stitch the lining to the fabric. Then, hang it and hope nobody noticed the seam.

Close up of the seamed fabrics

As it turns out, that was the right thing to do in this case. The shade looks nice in my office and really adds some life and pulls the colors I'm using in the room together.

I love how it brightens the space and looks feminine and cheerful.

Even with the sunlight streaming in, the seam is not obvious at all. And if somebody is nosey enough to look and see if there is a seam, they will just have to find it!


Thursday, July 7, 2022

Gallery Wall Refresh

Do you ever get an idea for a refresh and it just seems to snowball from one thing into another and another? Well, that is certainly the case for me lately. First, there was the laundry/pantry update and, more recently, I've tackled another.

Years ago I created a gallery wall of family photos in the hallway that the guest bedrooms and guest bath open into. I added to it a bit as time went on and new family members were added. Then, it seemed to become full and cluttered. I didn't really know what I wanted to do about it and thus, ignored it for a while (a few years). It was so out of date that a couple or three of our family members were not even represented on it and the youngest grandchild is now three years old. 

I got a germ of an idea earlier in the spring and decided that it would be one of my 'summer projects' this year while I was out of school for the summer. I had tried to schedule a family photo session back in the spring and a friend who is a photographer and I could not work out a good time to coordinate things when I thought all four of our childrens' families could be there. My idea was sparked when I noticed that our youngest had recently been a participant in a family photo shoot with his wife, children, and in-laws. 

I knew that I could get group shots of each child and his/her family from photos they had posted online or that I had shot at various times within the past couple of years. So, I began checking to see where I could get those photos printed on canvas. My thinking was that I could take down the eighteen 8" x 10" frames and 16 5" x 7" frames and replace them with those canvas prints. My plan was to just have the canvas prints done with a black edge and not even frame them since that is all that would be on that wall. This would make a nice, clean update and have all of our family represented as well. My goal was to order the canvas prints and give them to Mike as a Father's Day gift. 

I selected photos of each family group that were somewhat similar. All of them are pictures with a casual feel where they are wearing jeans and the family members are just clustered close to one another facing the camera. I found that I could enlarge the digital shots I had to a size 12" x 16" canvas with very little distortion. So, I ordered them and patiently awaited shipping. As is often the case lately, the prints did not arrive prior to Father's Day. Yet, they did come a couple of days later and that was really alright for me as well as Mike, who is always humbled by a gift from me.

I was excited to show them to him and called him to come to the house as soon as I unboxed them. He was thrilled with them and the idea that we finally had family pictures of all of them even if we still don't have a huge photo of everybody together. I explained where I planned to hang them and he frowned. "Nobody will ever see them there unless they happen to go back there to the bathroom. Can't we put them somewhere so that anybody who visits us will see them and we can see them more often as well?"

So, my plan was foiled. I began thinking and a new idea crept upon me. In our den we have a wall where I hung high school portraits of Bridgette and Bryan alongside a beautiful portrait of a young Stephen and Laura. Both sets of photos were made at about the same time and captured our children at about the same age. So, it had worked together well when we blended our families.

Family Portraits in the Background

I decided that I could move those photos to the hallway and that would update and clean up the clutter there. Then, I could hang the new canvas prints in the space occupied by these formal portraits. As I stood there in the den, I realized that the canvas prints would be the only artwork that would not have a frame. In there we have some paintings and prints with antique frames that have gilding on them hanging above the the sofa. There are also some prints with antique frames. So, in my opinion, the casual vibe of the canvas prints needed to be dressed up a bit in order to fit.

Then, the search for reasonably priced frames of the correct size began. I found a place that made some standard frames that had a similar vibe to these prints I inherited from my Granny. I needed something that would not be too fancy but would still add a finished and polished look to the casual canvas prints. I decided the style shown below would do the job and ordered them.

Frame Style

Of course, these frames were designed for photos and came with glass. So, when they arrived, I realized that I would need to find some sort of clips or clamps to hold the canvas frame in the picture frame. Again, the search began. I measured the depth of the canvas when set inside the frame and found an appropriate clip. Then, ordered those.

Mike helped me attach the canvas prints to the frames. Then, I added the picture hanging hardware and finally hung the family portrait collection. While the entire project was a couple or three weeks in the making, we are really pleased with the finished product. Every time I catch a glimpse of the photos of the entire crew, I smile and have a little flutter of pride that we are so blessed to have such a wonderful family.


Wednesday, July 6, 2022

Laundry/Pantry Update!

Our laundry room and pantry are actually just a hallway with closets for the washer and dryer and for food storage. There is a doorway leading out onto the back porch on one end and the other end is open toward a little space where the main bedroom and basement doors are. It is an important part of our house but the only ones who spend much time there are Toby and me. Therefore, it has been somewhat neglected the entire time I have lived in this house. Oh, I've organized the pantry and had hung some sundries on the wall but really, it was just left to be a functional space with no love...until this spring.

Way back in the summer of 2018, we splurged on a house update and had the windows replaced. We also had one of the doors replaced at that time - the one that leads out of the laundry room onto the back porch. In the process of that, a part of the floor needed replacing due to water damage where the rain and weather had leaked in from the previous door. So, we were left with a space that looked like this:

Dated linoleum with a hole cut into it and nice roughed-in plywood space for the floor. Bifold closet doors that were off-track and dragged across the floor in one spot. One might say it was a space where sadness abounds. However, Toby and I just made the best of things and went on about our business. I gave him a nice little pallet to lay on and we were careful to make certain the doors didn't fall off when washing and drying clothes. 

The washer and dryer were a bit old-school. The dryer came second-hand from a 2014 or 2016 Facebook post where Mike's nephew needed a washer for the dairy barn and we needed a dryer because our old one was going through a couple of cycles to get clothes dry. We each gave the Facebook poster a $100 bill and we had new-to-us appliances. Both the washer and dryer were noisy but serviceable. Then, last summer, the dryer started needing a bit more time on heavy loads to get things dry. So, our eldest grandson, Harris, and I pulled it out to suck lint out of the vent. In doing so, we found that the plastic pipe that led outside had begun to crumble from years of age and use. We did a really marvelous job of duct taping it to repair and hold it in place. However, over the winter, the dryer started making a high-pitched squeak and squawk and often needed a second cycle to get the clothes dry. Mike and I decided it was time to bite the bullet and get a new one. 

Ordering a new washer and dryer sounds simple until one takes a pause to consider that the vent pipe needed replacing and the floor needed replacing first. Plus, finding a handyman to take care of those jobs in this era proved difficult. We checked locally and found nobody would even respond to our call. So, we decided to call on my cousin's husband who had done some work for us during the pandemic, Richard Stanaland with The Tool Chest. He was willing to put us on his list even though the drive is almost an hour from his house. He and cousin Faye came over and gave things a good look. We agreed that adding bead board to the long wall opposite the washer/dryer closet and pantry would be a good idea and found a couple of non-working fluorescent light fixtures in the pantry and washer/dryer closet that I didn't even know were there. Richard agreed to replace them as well. He took measurements and gave me the dimensions for the amount of flooring to order. Then, about seven weeks later, he sent me a text message saying he would see us in a couple of days. 

Now, my hope was to put a tile floor down in this area because I wanted it dog and waterproof. After all, this serves as Toby's 'room' most of the time. However, that was not a possibility without some major reconstruction on the door opening because it was so near to the plywood sub-floor. We all decided that reconstruction wasn't a good option and Richard suggested we look at vinyl plank flooring to get similar protective covering. Wow! there were so many options. So, right after Richard's initial visit, I surfed the net and looked at all the options. Mike quickly told me that whatever I thought would suit him fine. So, I landed on one and ordered a sample. Within a couple of days, I ordered the amount that was suggested by Lowe's according to the measurements and it was delivered by the end of the week. So, we slid it under the bed and it lived there acclimating till our opportunity on Richard's list came up. 

Mike called a friend who said he'd take the washer and dryer away and Stephen, Mike, and I moved them out onto the back porch. I cleaned things up a bit and removed everything that was on the floor of the pantry and the items on the wall to be ready for our handyman. Richard's first steps were to remove the baseboard and shoe molding. Then, he went straight to work cutting and laying the flooring. By day's end, the floor was installed, baseboard and shoe molding was re-installed on the closet side of the area, and things already looked lots better!
Inside the pantry

Inside the washer/dryer closet

View down the hallway while standing at the outside door

Since school was still in session, during my lunch break, I ordered the washer and dryer that I'd decided would best suit our needs and found that it would be delivered promptly within a couple of days. The late afternoon found me at the local Ace Hardware store selecting paint. I had originally thought about using a green because I was really amazed at how great this Butler's Pantry looked. However, I knew that I wanted to paint the entire long wall from baseboard to crown molding and worried that it would be a bit dark and overwhelming for such a small space. I then decided I would paint the same color as the outside of the doors on the back of the house, Wythe Blue by Benjamin Moore. However, as I stood in the paint aisle, an image on one of the inspiration pamphlets jumped out at me and I landed on Gossamer Blue by Benjamin Moore. Soon, the paint was tinted and shaken and I was on my way. 

The next day, our handyman installed the new vent piping for the dryer and the bead board along the long wall shown in the image above. Using the style with a little ledge and a couple of molding pieces that is in our guest bath, he topped off the five-foot run of bead board. Then, replaced the baseboard and shoe mold and rehung the bifold doors for the washer/dryer closet and pantry. He finished out the day by replacing the newly discovered light fixtures, swapping out the outlets and light switch plates from dated cream to modern white, swept up the dust, and was on his way. Quick work! Plus, everything looked so much better!

I got a notice that the washer and dryer would be delivered the following day. So, after I finished up work for the day, I rolled paint on the walls in the washer/dryer closet. I knew that we would not want to pull those appliances back out when the painter came and figured Toby and I would be the only ones to ever see that area. I didn't even care if the odd nail holes were patched and repaired - just wanted everything in there covered with a new coat of paint. So, by bedtime I'd slapped a couple of coats of paint on the wall.
Sad looking before of the washer/dryer closet

Brighter, cleaner looking after

Shiny new vent pipe and paint coating the walls

The young men who delivered the new washer and dryer were so patient and careful. They were patient with Mike and I chatting with them throughout the process and were patient in maneuvering the appliances into tight quarters. They were careful not to mess anything up and to be sure that the appliances were installed properly. So far the entire process was a wonderfully satisfying experience.
The new appliances in the freshly-painted washer/dryer closet

When I ordered the washer and dryer, Mike had called a local painter who had done work for us before. He said he would work us in soon since it was just a small job. So, after a couple more weeks, we got a message that he would show up the next day, bright and early in the morning. After I finished up work that day, I made a quick dash to the local Ace Hardware and they tinted a primer for the bead board for us. Then, after dinner that evening, I emptied out the pantry and gave everything a good cleaning. 

Pantry contents stashed to the side of the den

Pantry contents piled atop the dining room table

Empty but clean pantry shelves

Empty shelving in the pantry

(Richard, our handyman, had done a bit of adjustment on the pantry shelving back when he installed the front door a couple of years ago. Instead of having shelves that were two shelving boards wide, we now had brackets and the shelving wrapped around the walls. Very little storage space was lost and seeing everything on the shelves made things easier for me to keep organized. The only expense beyond paying Richard was the brackets for the old shelves that were cut to fit.)

At the end of the next day, all the walls had been painted and everything looked fresh and clean! While I had hoped to have walls, brackets, and shelving all painted, the painter told me that he thought the shelving should be painted with a trim type of paint rather than what I had purchased for the walls. So, he removed the the shelving, which would remain white and everything else got a good coat of paint.
The bead board wall, painted

The pantry, painted

A couple of days later, my daughter, Bridgette, made a visit. Since she is one who likes to use power tools (and Mike is not much of a handyman), she and her girls helped me to re-install the pantry shelving. 
Nice, clean shelving and walls

Stocked and organized

I replaced all the stuff and even ordered a couple more storage bins and turntables to keep things organized in the pantry. Now, the corners each have these Lazy Susan Turntables in the corner and ample bins to hold like items for easy organization and retrieval. 

The lights in the pantry and the washer/dryer space are so nice and brighten up even the most mundane chore and search. While the entire process took more than a couple of months, it was well worth the wait, the temporary disorder, and the expense. I love my new quiet and efficient appliances and the space is fresh and welcoming even when the chores required in that space are not thrilling or exciting. I've made a couple of tweaks that I will share in a different post but Toby and I are really happy with this little workhorse space!

Monday, November 30, 2020

Porch Oasis


During this time of staying home our front porch has become an oasis for me. The sun shines in during the morning hours which is great during this cooler time of year. It was also great during the summer months because the shade would cool things down as the sun rotated around to the other side of the house. I have enjoyed sitting out there and watching the world go by down the highway that runs in front of our house. I'll take a tablet out there and check my personal email and catch up on blog reading. I'll peruse some online magazines or Instagram and pin some inspirational photos. 

Sometimes it would just be my loyal companion and I and sometimes we might have a few visitors.

I was so grateful to have this space as an outdoor room where we could read a book, watch the world go by, take a nap, and just relax.  One thing I did notice during July and early August is that even though the space was shady after lunchtime, it still was a bit hot. Plus, late in the afternoons when there was no air stirring the mosquitos tried to feast on me. So, Mike and I talked about it and decided a ceiling fan might be a good investment.  As with most home choices, Mike left it to me to decide the style and location. So, when we had Richard Stanaland from The Tool Chest here to do a few handyman jobs, I made sure to have the ceiling fan ordered and ready to install.


Since it was already October before we got around to having the work done, the dog days of hot weather were already past. We've had a warm day or two and I turned the fan on in the afternoon when I went out after finishing up work. So, I know that the stirring air discourages the mosquitos and bugs somewhat. I'm looking forward to the breeze it will provide when next summer comes, though!

Sunday, November 29, 2020

A New Front Door!

This house was moved here in the year 2000.  It came from just down the road and around the bend. It was originally built by my mother and father-in-law. Most of the features of the house remained the same, I believe with just a few minor changes. The antique clawfoot tub was replaced with a garden tub with jets. There was a window seat added to the bay window. A tin roof replaced the shingled one. Some simple changes and upgrades. Over the years, some things have needed updating and replacing or repairing but by-and-large this house is very much like when it was built.
We have continued to maintain and update and repair as our budget allows. During the past few years we've replaced the windows and a couple of the exterior doors. At some point the storm door got caught in a wind storm that ripped the hydraulic closer out of the wood frame leaving the storm door where it would not close snugly. Then, last year, we noticed that the sun peeked through the panels in the door each morning. So, we knew it was time to start planning for an update. I started searching and dreaming for what I wanted. Looking through blogs and magazines and Instagram posts. I started pinning colors I might like and styles of doors.

At first, we thought it would be a matter of simply swapping out the door itself. Then, we noticed that it seemed to be connected to the sidelights. So, that became a bit more of a budget planning issue. We had a few other odd jobs that needed some attention - a plug for the pellet grill, a patch in the ceiling drywall, etc. So, I called on my cousin's husband who had recently started a handyman service, The Tool Chest. We shared our ideas and he set up a projected date when he would get started.

First, Richard came and completed the small projects. Before he left for the day, he sat with me here at my computer and we ordered the new door with sidelights and the hardware for the door.  I was somewhat nervous about it because I know so very little about construction and that sort of thing. So, I was glad to have his guidance and knowledge. I mean, I didn't know if I wanted left-hand swing or right-hand swing. I thought I knew but it was so assuring to have Richard confirm what was needed.

Mike said he wasn't picky about it and trusted my judgement. So, I knew I wanted glass in the top half. Being home so much this year made me come to appreciate having the wood door open and the sun streaming in through the storm door. I loved how that lightened up the whole room. I also knew that I wanted a wood finish. The porch furniture we had gotten last year has a wood finish and I really have enjoyed how it feels cozy and makes the porch seem more like an outdoor room of our house. So, I wanted to do the same thing with the door. I also came to the decision that a lighter color would be better because wood usually darkens over time. So, sight-unseen, I pulled the trigger and ordered our front door!

I also debated on changing the hardware. We'd replaced the lanterns on the front porch a few years back and I got black ones that were also easy to swap out the light bulb for. So, I seriously thought about going with oil-rubbed bronze or a black finish for the hardware.  In the end, though, I decided to stick with the brass that was there before. I knew that I liked the handle on the outside that was on the old door but I also wanted the lever-style handle on the inside. I've had arthritis for years and just find the lever handle easier to open. I had read years ago that when you have a glass door, you should have a keyed deadbolt instead of a lever deadbolt.  So, that was also added to my cart - again, sight-unseen. 

The one bobble that I made was with the doorbell. I ordered a brass doorbell that was all metal because the plastic button on the previous one had cracked and broken over the years. The one I ordered was too wide to fit on the door facing. So, we wound up having to go with one that had a plastic button after all.

When the door came in to the local store, Mike and I went over and picked it up. There was a crew of three women and one guy who put it up on two palette jacks and pulled it up onto Mike's trailer. We strapped it down and carefully hauled it home to sit in the barn for a few days.
We commented that we were a bit concerned that it might be difficult for Richard to get up onto the porch but decided that he knew what he was doing and recalled that he had said he would wait till a day when the boys could come help him. So, when it actually came time to unpackage the door and get it up onto the porch, Richard and his bonus son, Noland, had a bit of a struggle.  That thing was just as heavy as it looked! They took the door off the hinges to lighten the load and got it up there.

First the old trim, windows and door came out.
Then, the new went in.
I was working that day. So, I didn't have the opportunity to take many photos. This one came about sort of as a documentation. I was sitting at my desk here in front of the window working through Zoom meeting after Zoom meeting. I paused for a late lunch at around 12:30 or 1 o'clock when I was getting a bit toasty closed up here in this room. I had seen Mike go out the driveway to his haircut appointment. I had also seen Richard and Noland go out the driveway to pick up some needed supplies and their lunch. The day wasn't cold but there was a bit of a briskness about it.  So, when I came into the den and saw the door leaning up against the wall and the opening bare I understood a bit why I had gotten toasty. You see, the thermostat is in the hallway just off the den. The place where the door opening was left uncovered. So, the heat was running overtime trying to warm the space up! I just rolled my eyes and shook my head and said a little prayer that no squirrel or bird came in before the door install was complete.
I don't have a good photo from the interior as yet but I think you can tell how wonderful it is to have the windows and the light shining through.
The exterior view is absolutely beautiful if you ask me! I could not be more pleased with how it looks, the quality of the craftsmanship of the door and sidelights, the quality and beauty of the installation. I am quite smitten with it and think it looks so beautiful that I don't really want to do much decorating for the holidays because I don't want anything to be covered up!
It really does continue the warm and cozy feel that the wood furniture on the porch sets and it looks great from any angle!
We'd love to have you come knocking and walk right through for a visit!